Table of Contents
Drip irrigation
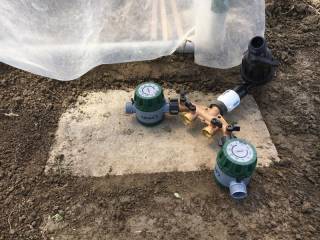
I intended to plant more in the farm garden than ever before. I remembered dragging a hose around watering during the previous year and believed I need to automate the process. It is really easy with long rows to damage plants. Also it is impossible to water all plants evenly.
Planning
 Creating a drip irrigation setup isn't an ad hoc process. It takes planning:
- Group plants with similar water needs
- Decide on plant and row spacing
- Calculate water requirements
- Consider the type of soil
- Design and prepare the lines
- Transplant
- Install the irrigation lines
- Add row covers in the early part of the season
In the garden at the farm I knew I was planting with wide row spacing and distances between plants so I chose discrete emitters, spaced as far apart as each variety required. So I didn't use a soaker hose, drip tape or sprinklers. The clay soil in this garden disbursed water horizontally quite well so there was plenty of moisture for root systems to spread. In sandy soil I would have planned differently. And if I had been irrigating row crops with close spacing I would have used a different approach.
Benefits
For me the biggest benefits of drip irrigation are:
- Consistent application for plants in a row
- Controlled and measurable amount of water (based on emitter flow and elapsed time)
- Doesn't require constant attention during watering
Concerns
As I began planning for drip irrigation I wondered if watering individual plants (such as summer and winter squash, and melons) would create dry zones that would be inhospitable to underground micro-organisms.
I believed this would be less a problem in the clay soil, in which moisture disperses more horizontally than vertically. Two years' experience suggests that moisture spread horizontally for a remarkable distance, stretching a couple of feet away from the drip emitter. The moisture-holding ability of the clay is helpful.
I suspected that in the Fall City garden's sandy soil the moisture would spread downward more than horizontally. This appears to be correct. I compensated by placing drip tape lines 18 to 24 includes apart, depending on crop. Where the soil is loose and uncompacted this arrangement maintains adequate moisture for a width of 3 to 4 feet.
In the hoophouse
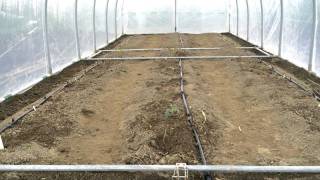
 Plants in the hoophouse had their own mainline. Because they are sheltered from rainfall the irrigation system provided almost all the moisture they received. I decided how many of each type of plant (tomatoes and peppers) and spacing between plants.
I configured the lines to provide equal amounts of water to each row. And each row contained both tomatoes and peppers.
In 2016 I observed that the peppers needed more water than the tomatoes so for 2017 I will adapted my design:
- I planted a single row of peppers, spaced at 20 inches apart.
- I spaced tomato plants at 24 inches.
- I put a control valve on each row so I can vary the watering from row to row.
Outside
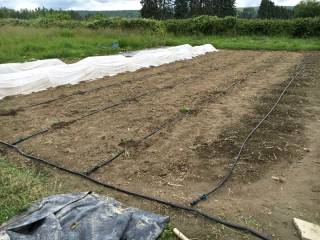
 In each row I planted a single variety or else varieties that had similar water requirements. Each row line had a valve to allow control of watering. Also, as I added a row or finished harvesting a row, I could adjust watering accordingly.
With row covers
I placed row covers over heat-loving plants early in the season. Using the automated drip irrigation I watered without disturbing the covers.
